SendGrid is the email method we recommend always, we have no affiliation with them, but it’s just a good service. Plus it has a great free tier offer, you can send up to 100 emails for free per day. The tier up are also really reasonable in terms of pricing.
Create your API Key
- You can create your account really quickly following this link: Sign up
- Once you’re done go to your SendGrid’s dashboard
- Click Settings > API Keys
- Click create API Key
- Enter a name that you will remember e.g. : mysite.com
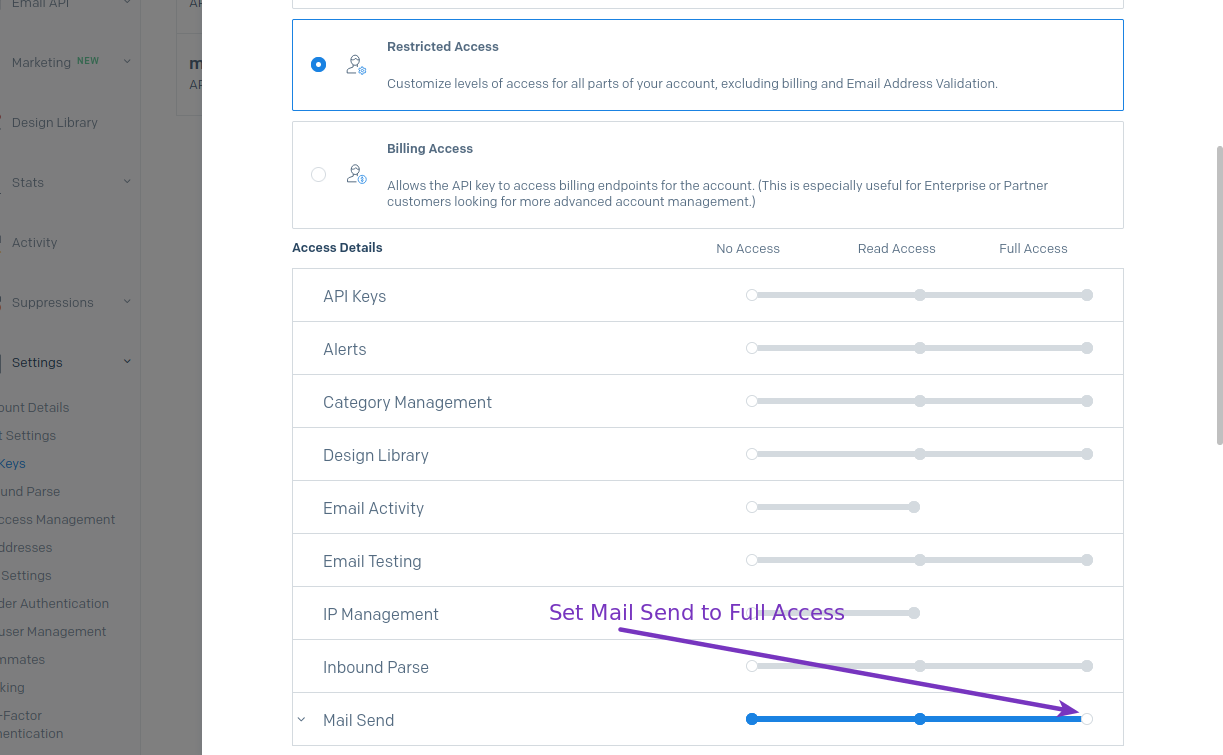
- Select Restricted Access
- Select Mail Send and set it to Full Access
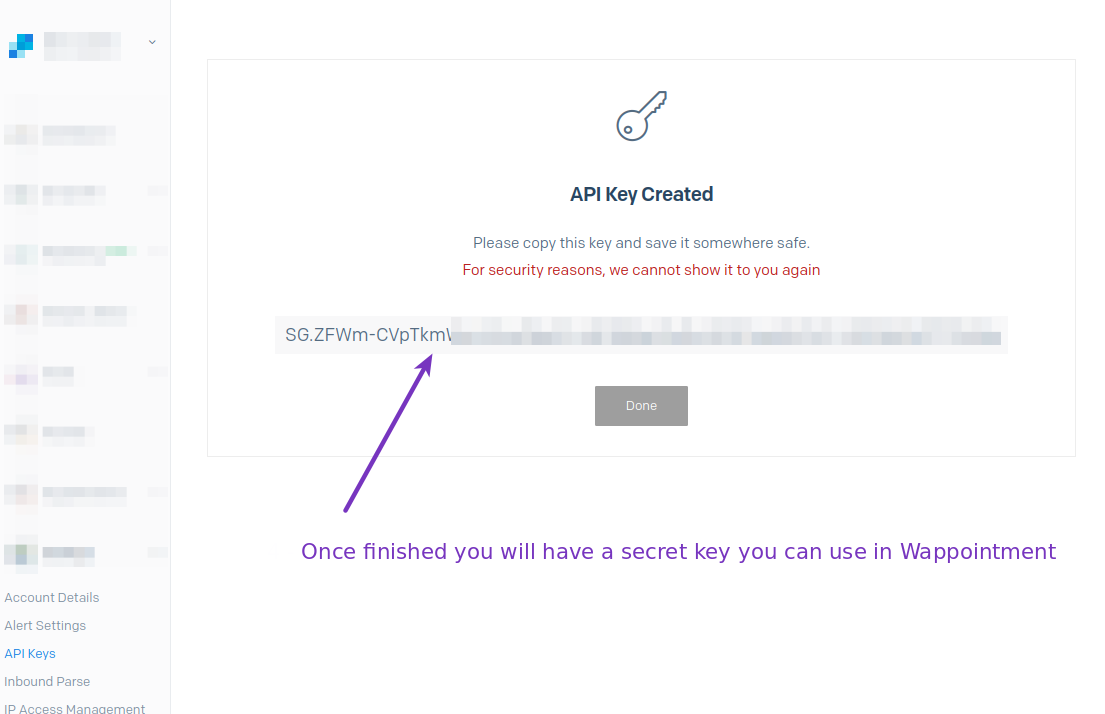
- Click Create & View
- Copy the API Key you see on screen
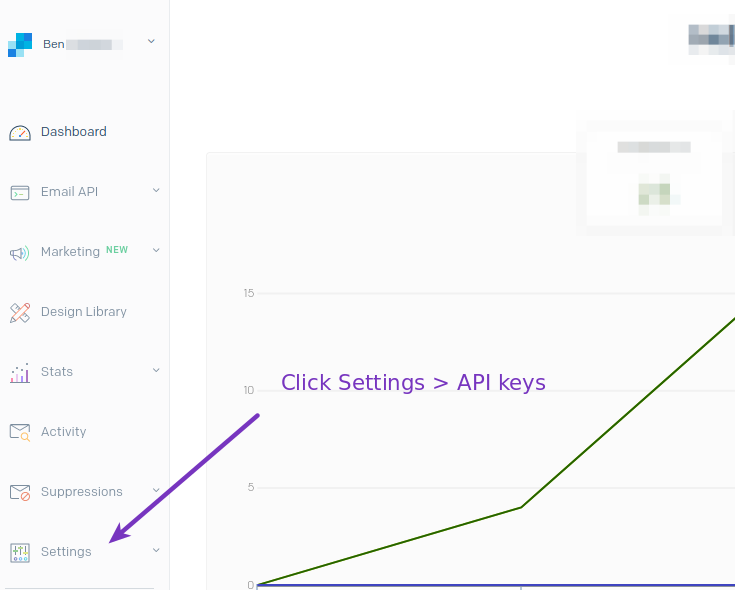
SendGrid’s dashboard 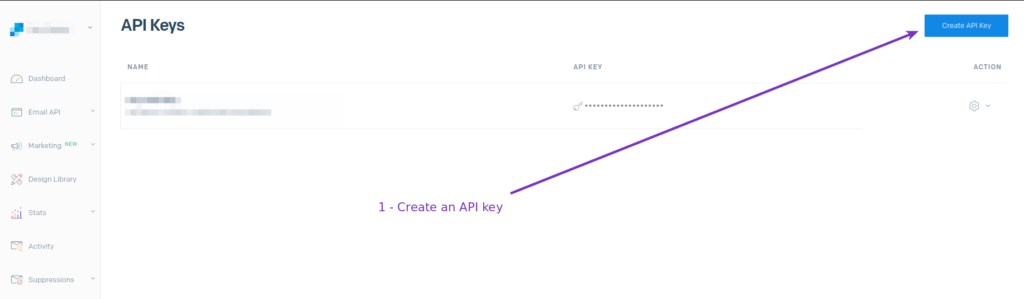
SendGrid’s create API Key 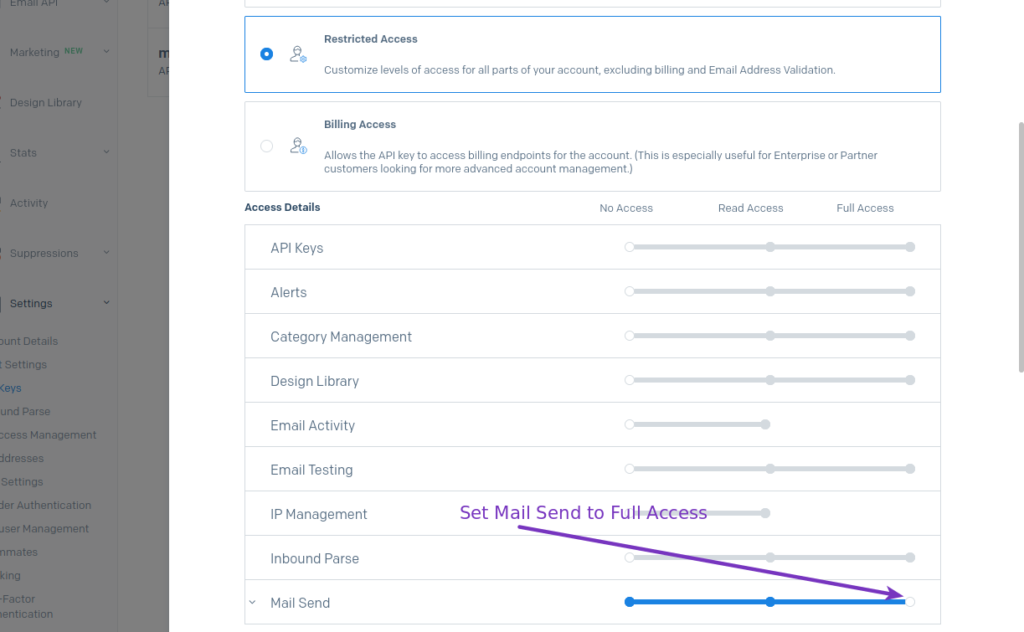
SendGrid create Restricted key 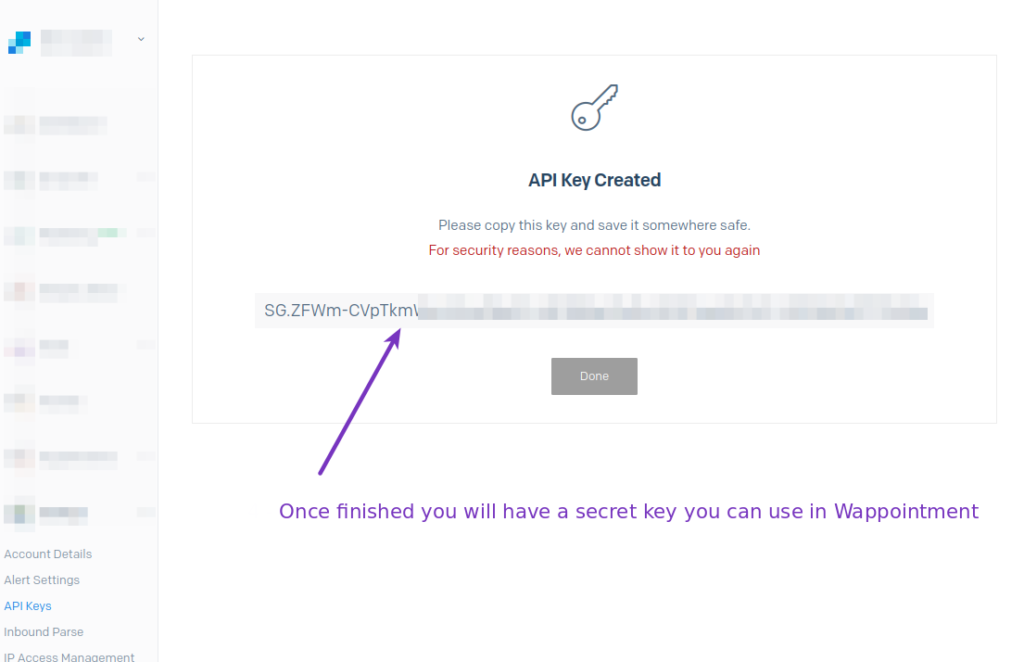
SendGrid copy API key

Sender Authentication
When sending an email from a 3rd party server such as SendGrid, you need to allow that server to send emails on your behalf, otherwise those emails will land in SPAM or even be blocked by email clients.
In order to do that in SendGrid :
- From SendGrid’s dashboard
- Click Settings > Sender Authentication
- Click Verify a Single Sender
- Fill out the form, an email will be sent to you so that you accept SendGrid can send on your behalf.

Sender Authentication Form
Next we can go back to Wappointment and configure the API key.
Connect Wappointment
In your site’s backend :
- Go to Wappointment > Settings > Emails & SMS
- Click Reconfigure it
- Click SendGrid API
- Enter the API key generated in SendGrid’s website
- Then click the From Address Line to enter a Sender you’ve authorized in the Sender Authentication step
- Click Save
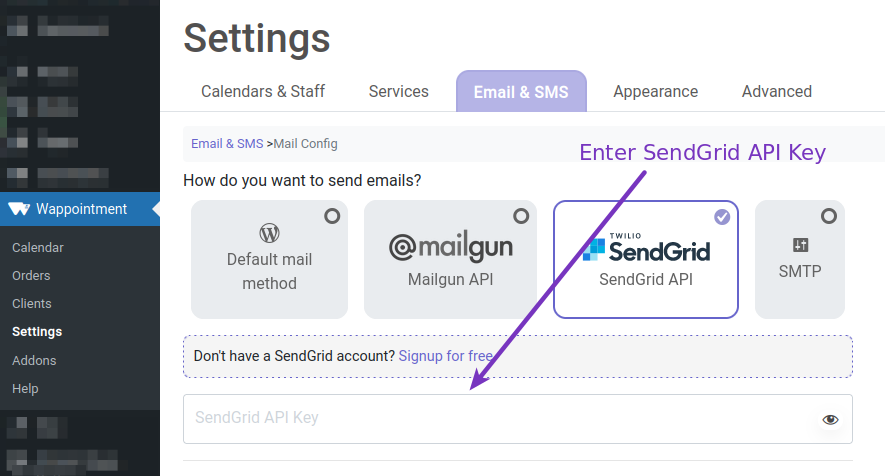
Enter SendGrid API key
That’s it, SendGrid is configured.